Drupal CMS includes a ready-made contact form so your site visitors can easily get in touch with you. This tutorial shows you where to find that form, how to test it, and how to customize it for your needs.
We’ll walk through common edits like changing where messages are sent, updating fields, and preventing spam.
Back to topGoal
Find, test, and customize the contact form provided by the Drupal CMS Forms add-on.
Back to topWhere to find the contact form
The contact form is provided by the Forms recommended add-on. If you haven’t done so already you’ll need to install the add-on. Then:
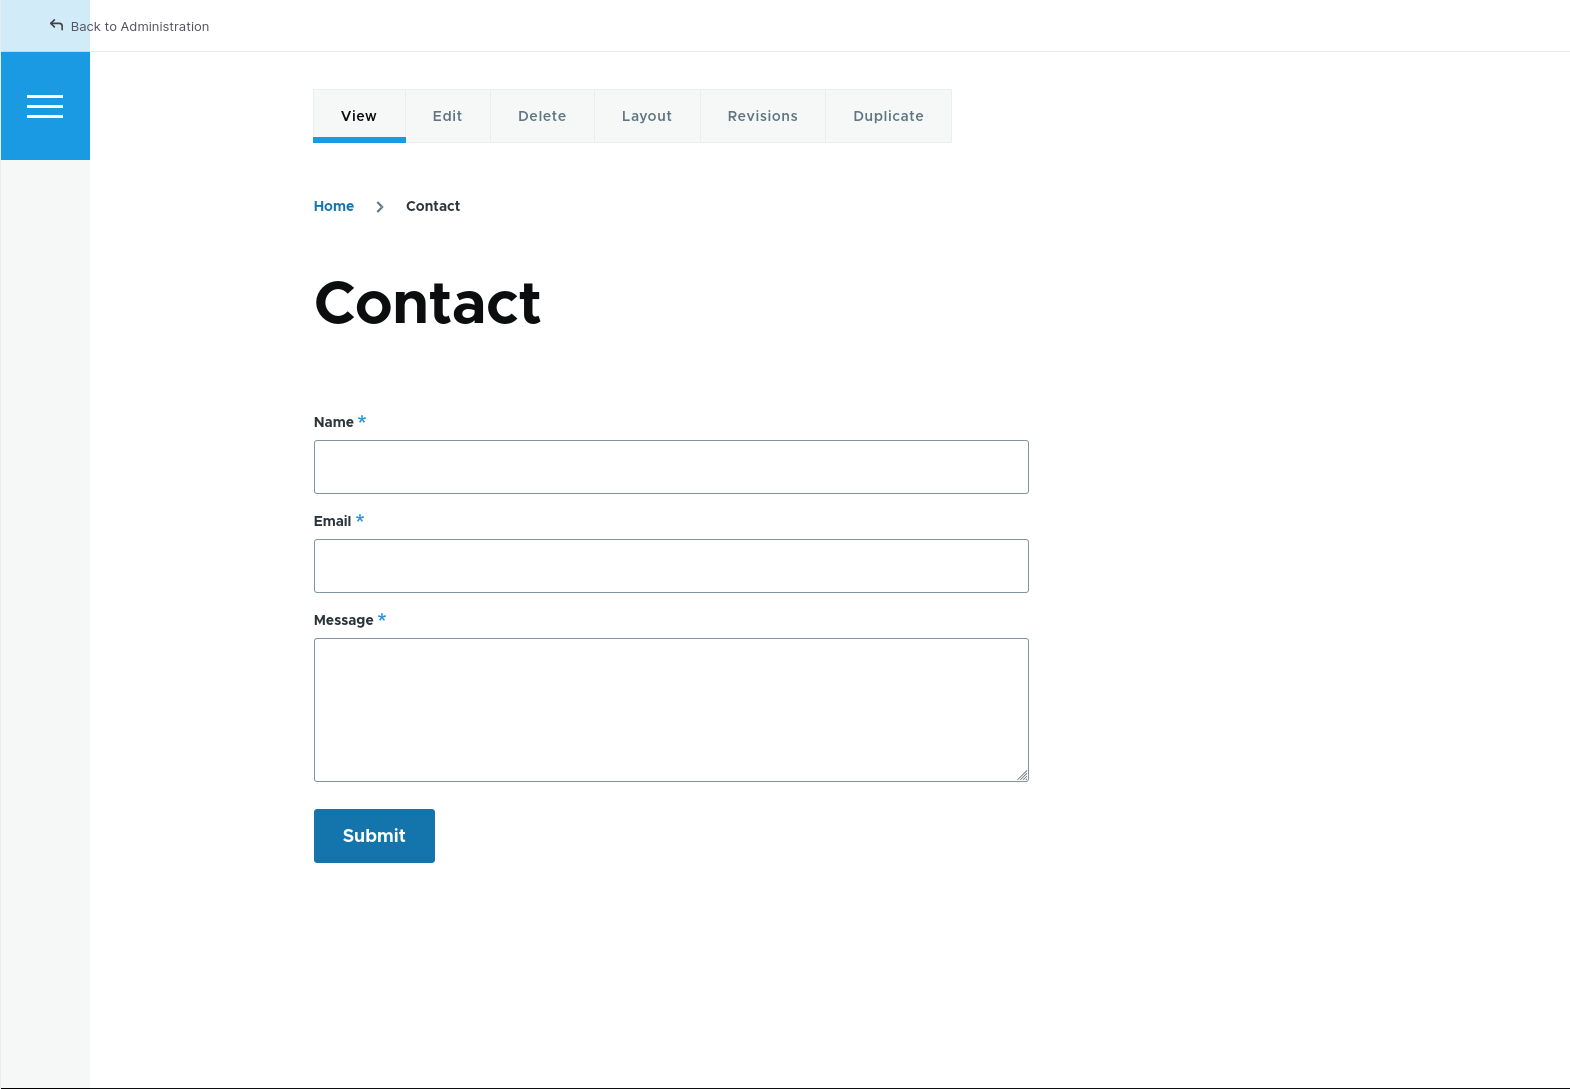
- The contact form is located at /contact, and can be found via the Contact link added to the site’s main navigation.
- You should see a form with fields for name, email, and message.
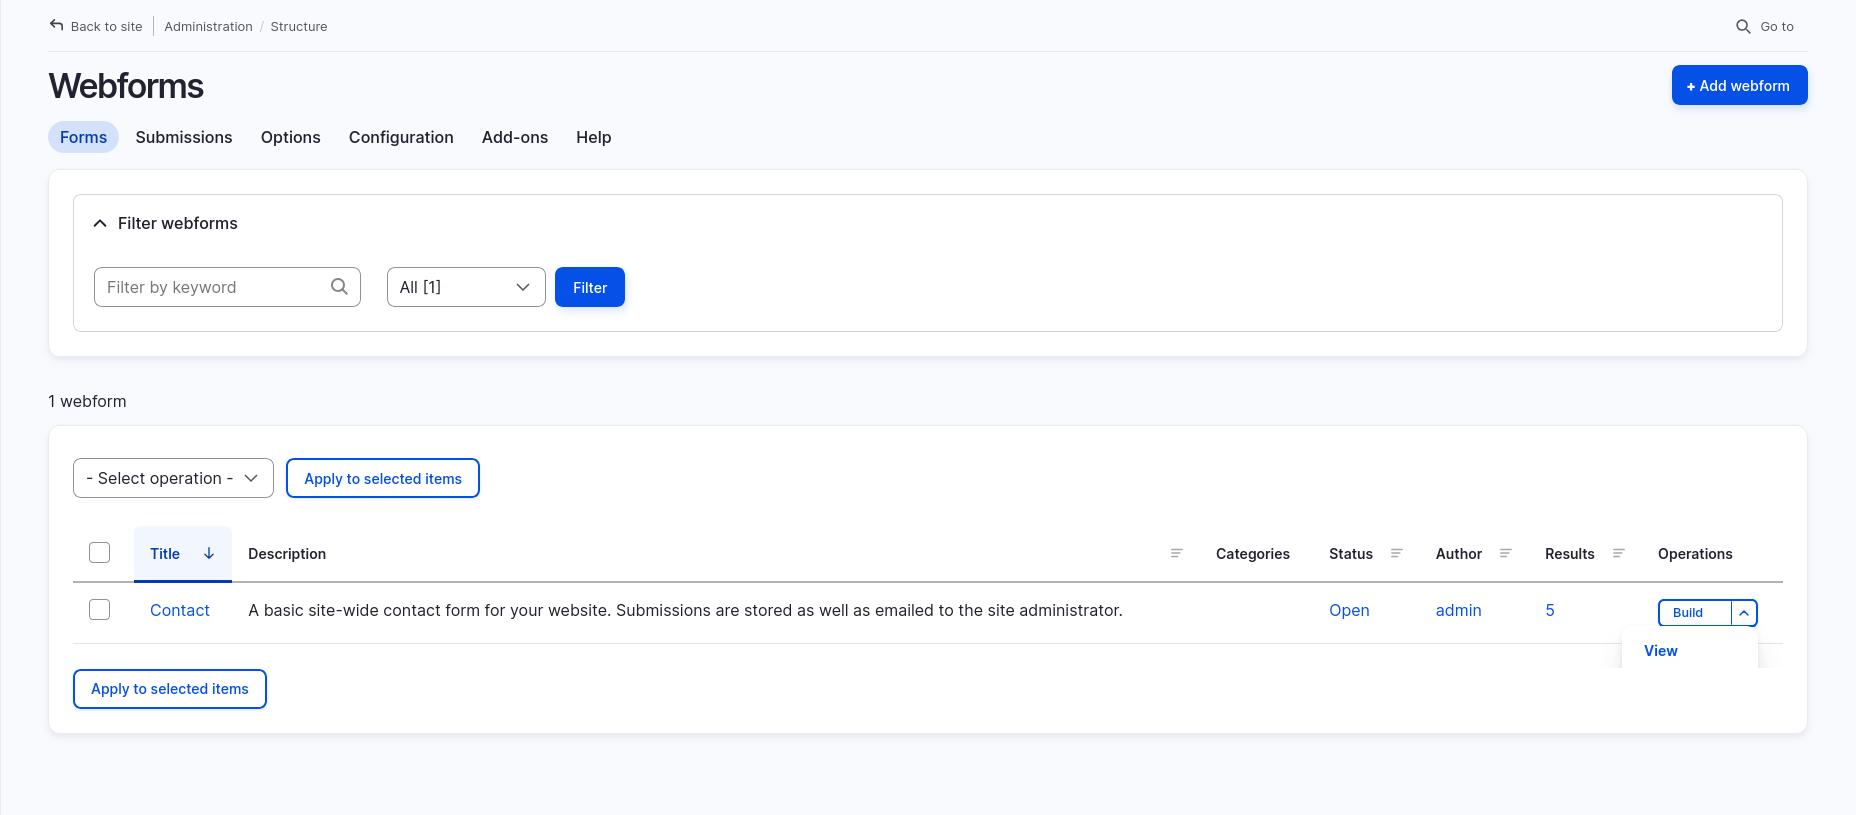
In the administrative interface the contact form, and its settings, can be found by navigating to Structure > Webforms (/admin/structure/webform)
Test the form
Try submitting the form yourself:
- Fill in each field and click Submit.
- You should see a confirmation message.
- Check the site email inbox (set in Configuration > System > Basic site settings) to confirm you received the message.
Change where the form sends email
By default, form submissions are emailed to the site’s contact email (configured at Configuration > System > Basic site settings (admin/config/system/site-information)).
To change this:
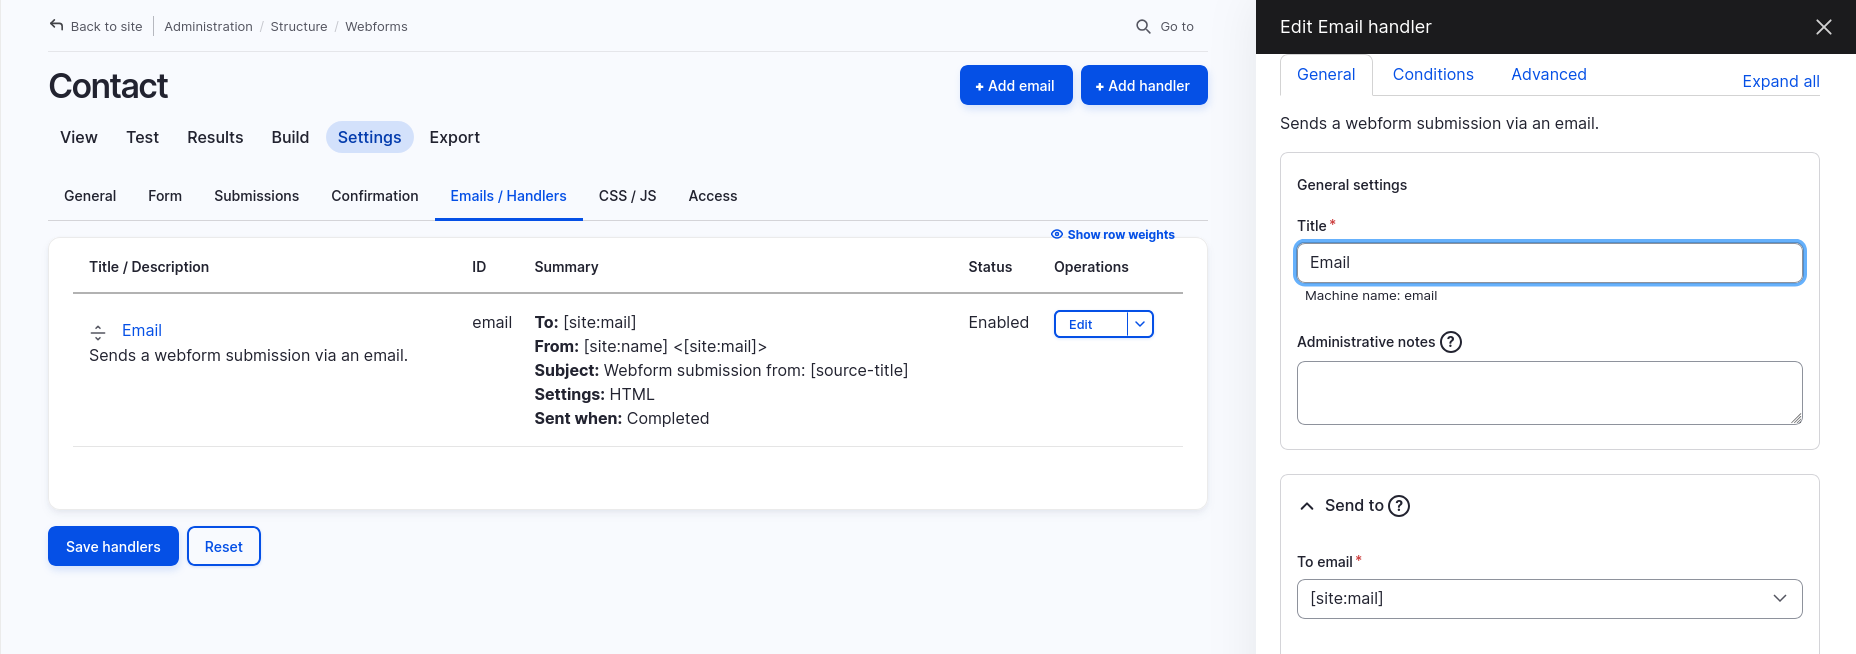
- Go to Structure > Webforms (/admin/structure/webform).
- Locate the Contact form, and choose Settings from the Operations menu.
- Under the Emails/Handlers tab click Edit next to the default email handler to change the email it sends to. Or, choose the Add email option to send to multiple different email addresses.
- Update the To address with the email you want messages sent to.
- Click Save.
Customize the form fields
You can add new fields (like a phone number) or remove fields you don’t need.
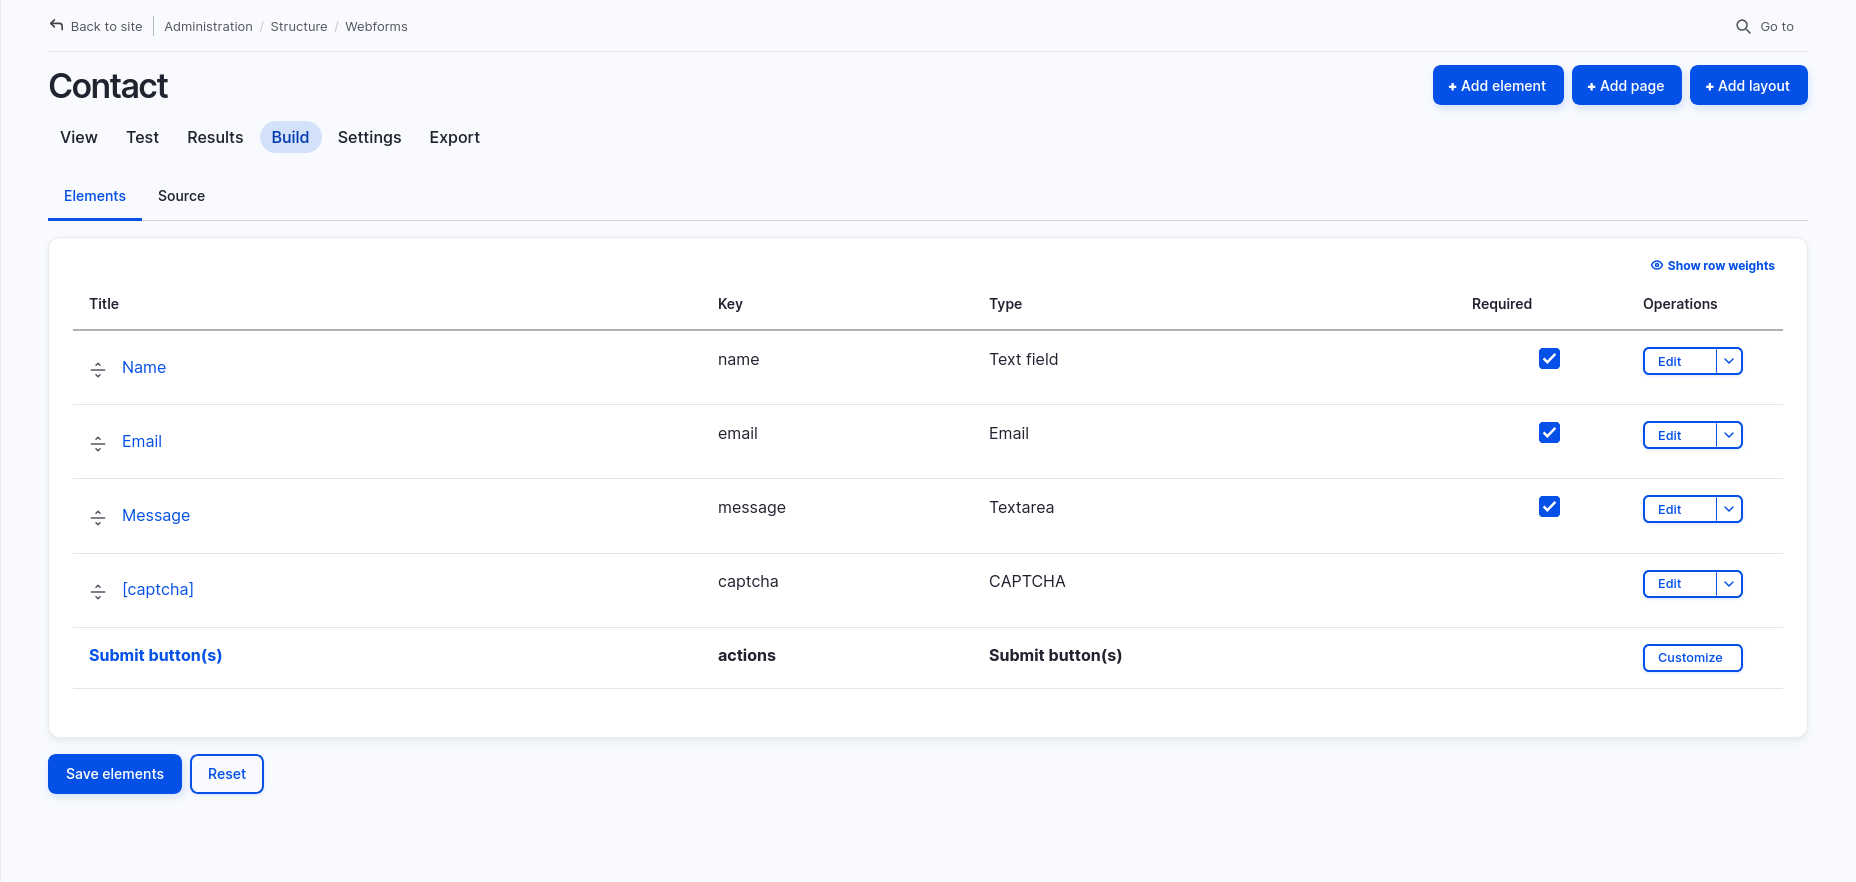
- Go to Structure > Webforms (/admin/structure/webform).
- Choose the Build option from the Operations menu next to the Contact form.
- Use the Add element button to add a new field.
- To edit or remove a field, click its Edit or Delete link.
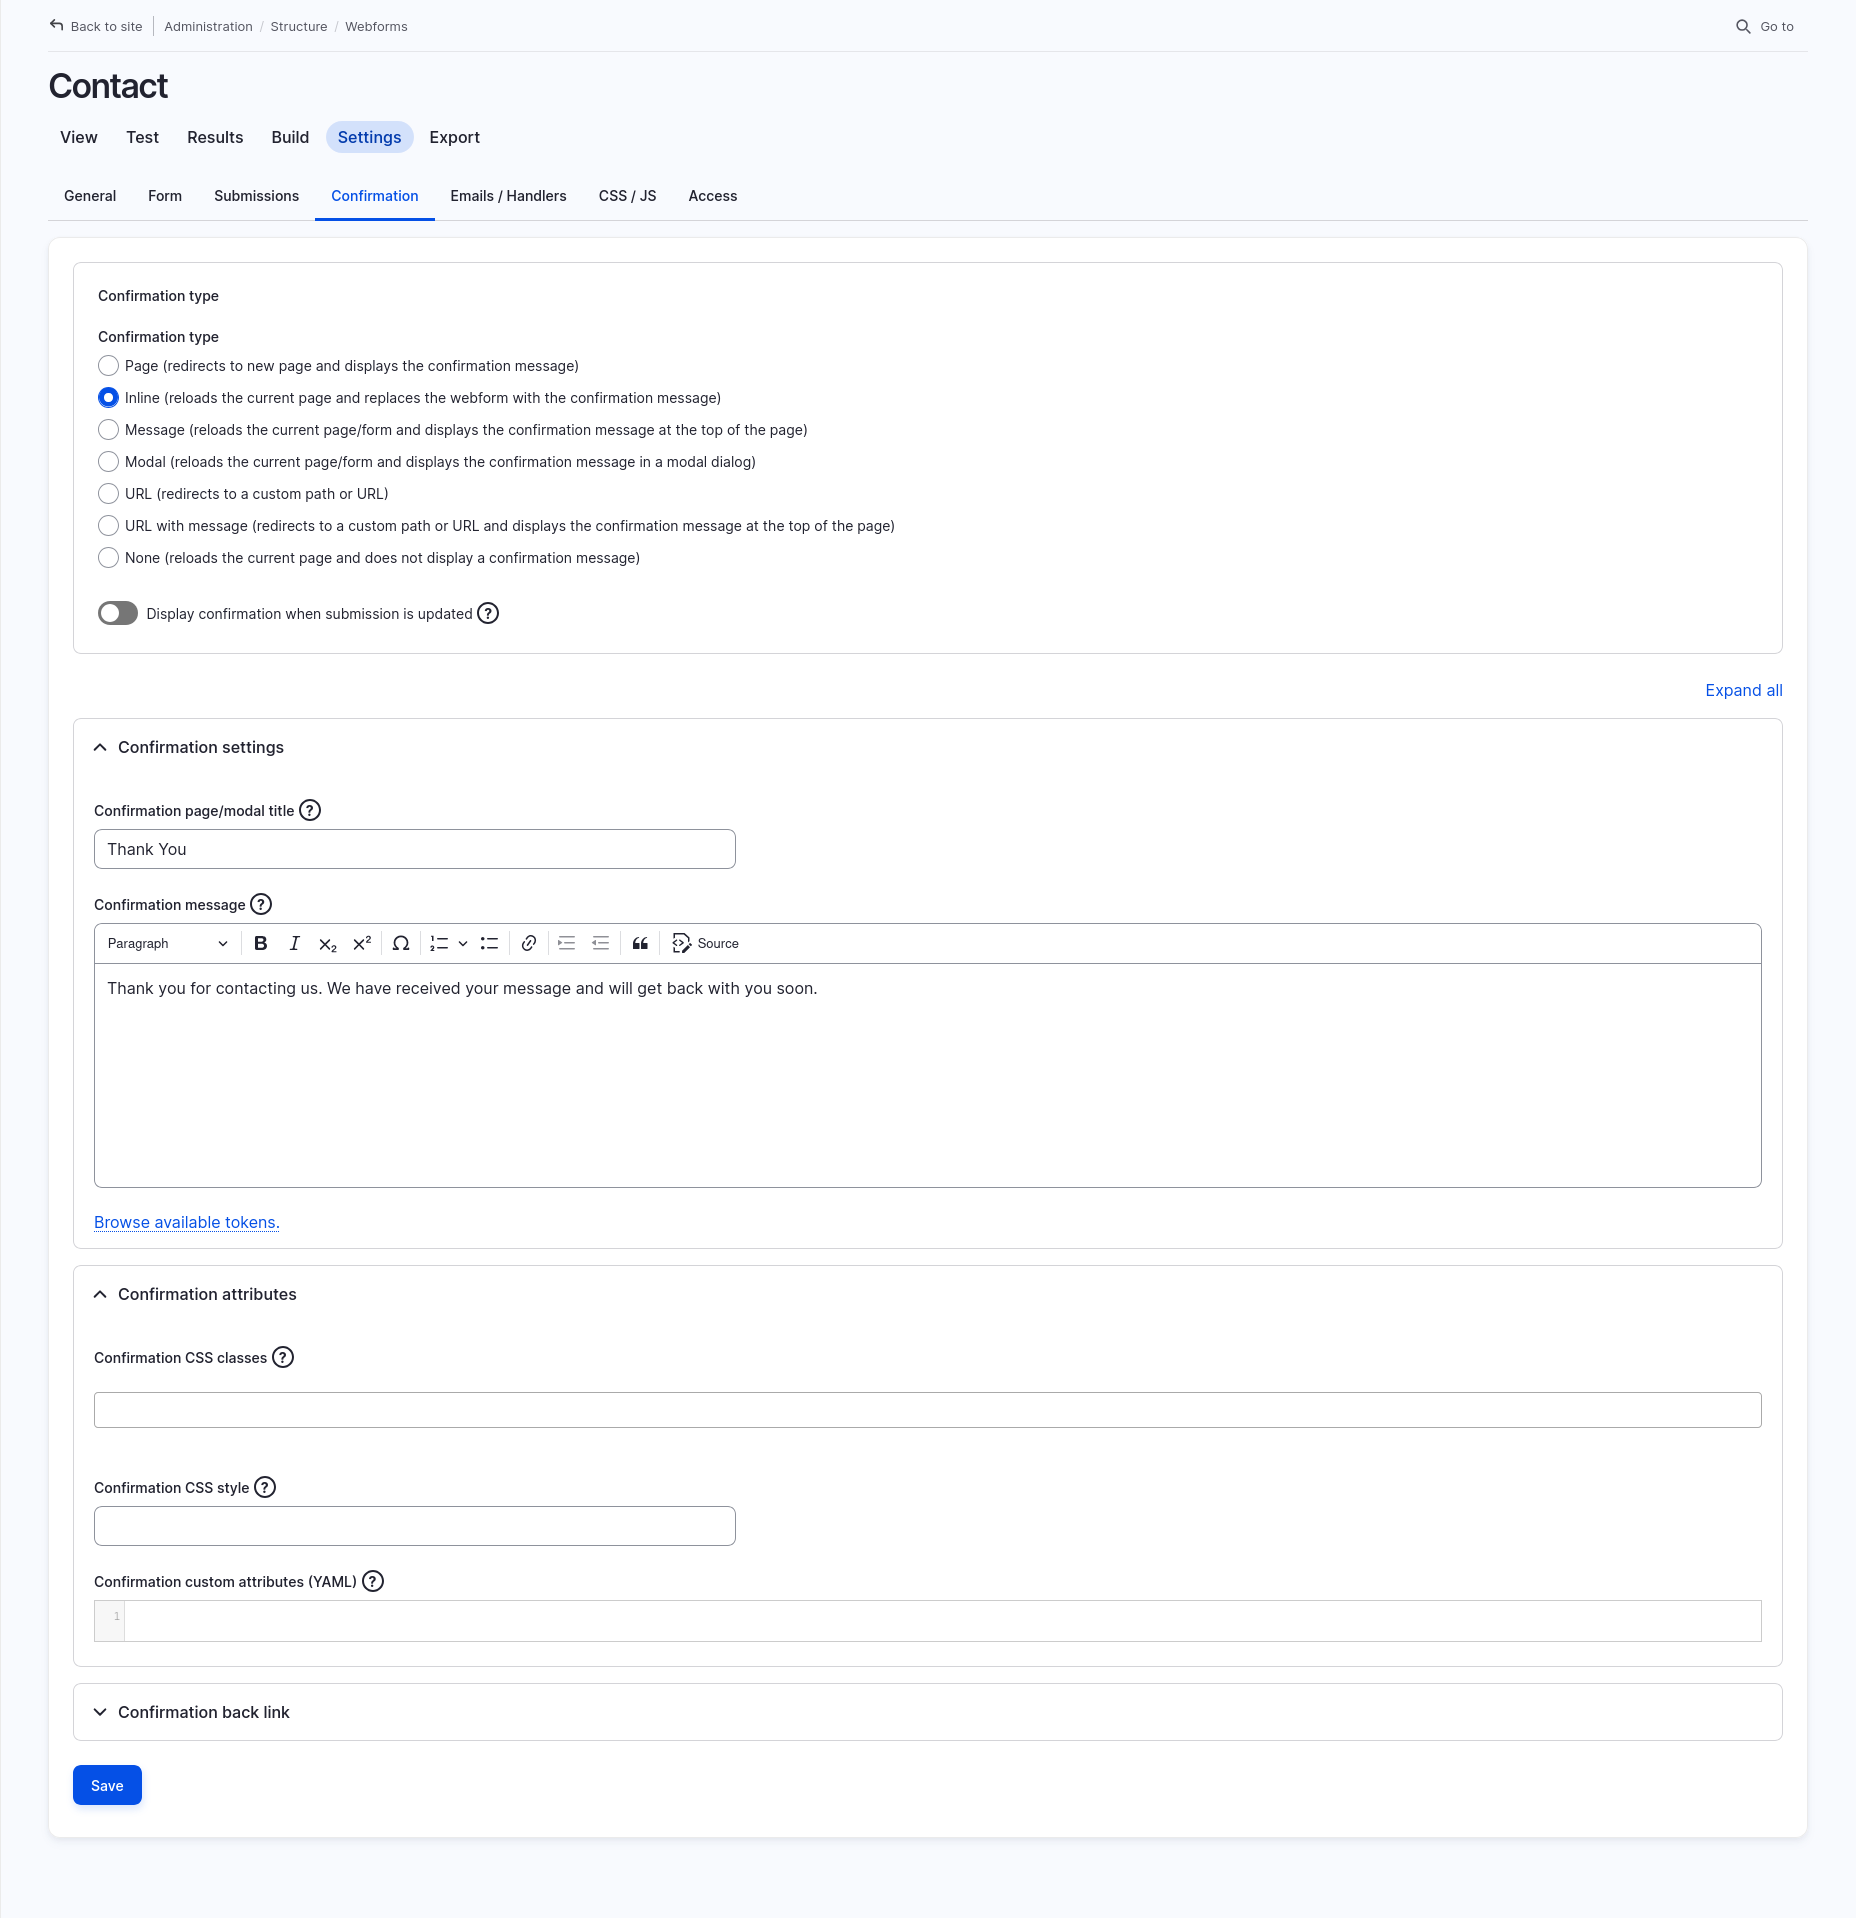
Change the confirmation message
- Go to Structure > Webforms (/admin/structure/webform).
- Locate the Contact form, and choose Settings from the Operations menu.
- Under the Confirmation tab, edit the message users see after submitting the form.
- Click Save.
Prevent spam
This contact form includes basic spam protection using CAPTCHA and Honeypot.
- CAPTCHA shows a challenge field to prevent bots.
- Honeypot adds a hidden field bots will accidentally fill out.
You can manage the CAPTCHA settings for the form by editing the [captcha] element of the contact form.
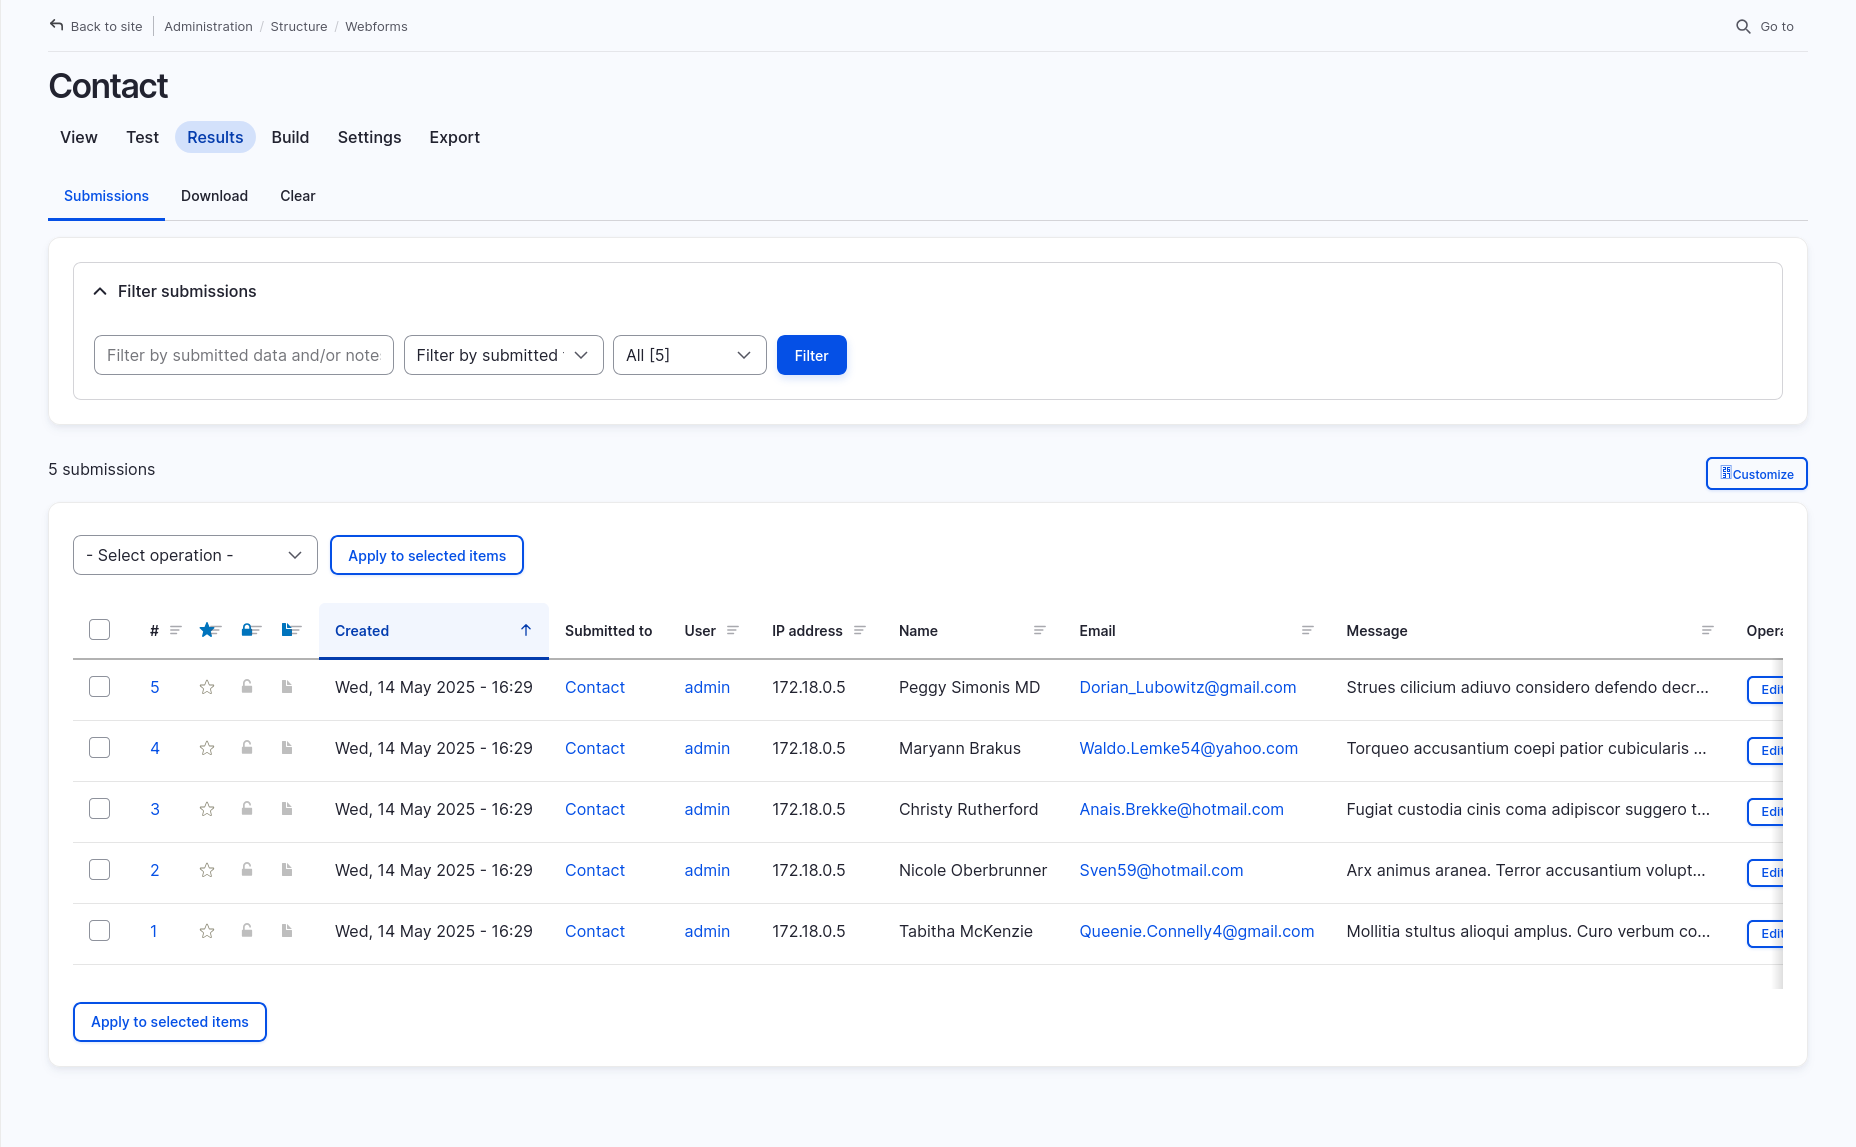
Back to topView past submissions
By default, submissions are stored on the site, and can be reviewed.
- Go to Structure > Webforms (/admin/structure/webform).
- Choose the Results option from the Operations menu for the Contact form.
- From here, you can view, download, or delete form submissions.
Learn more about Webform
The contact form in Drupal CMS is powered by the Webform module – a powerful tool for managing forms on your site.
With Webform, you can create more than just contact forms. You can build:
- Surveys
- Registration forms
- Newsletter signups
- Feedback and support request forms
It includes features like conditional logic (show/hide fields), email handlers, confirmation pages, and even integrations with external services.
Explore Webform further by navigating to the Structure > Webforms (/admin/structure/webform) section in your admin toolbar and try creating a new form from scratch.
You can learn more about the project at https://www.drupal.org/project/webform, and by reading the documentation .
Back to topNext steps
Now that you’ve customized your contact form, here are a few things you might want to do next:
- Create a new form for a specific need (like a feedback survey to send someone after they've participated in a wine tour).
- Explore conditional fields—like showing a follow-up question only when a certain option is selected.
- Add email autoresponders to send a confirmation message to users after they submit the form.
- Integrate with services like Salesforce if you need to track data in your CRM.
Wrap-up
Drupal CMS gives you a flexible, easy-to-use contact form out of the box. In this tutorial, you learned how to find and test the contact form, change where messages are sent, customize the fields and confirmation message, add spam protection, and manage form submissions.
We also learned the contact form is built using the powerful Webform module. From here, you can explore more advanced options like using conditional fields or setting up custom confirmation emails to match your site's voice and desired user experience.
Back to topAdditional resources
- Webform project (Drupal.org)
- Webform documentation and video tutorials (Drupal.org)
